Whoa that title is a mouthful!
Hi everyone!
I hope everyone had a great week. Mine was crappy. The strep throat demons decided to pay me a little visit so I’ve been hold up in the house. Not fun, people. Not fun. I wonder… how on Earth did our fore fathers ever survive without antibiotics? Well, I guess many of them didn’t? Thank the heavens for the power of modern medicine. I digress….
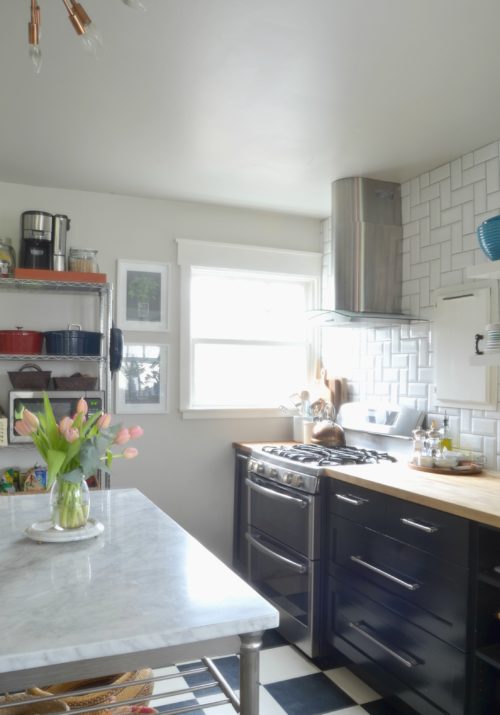
I took my temporary quarantine as an opportunity to get some stuff done around here, the largest of which would be finishing up the back splash.
I’m back today with the conclusion of how we finished up the project. Now where were we? Ah, yes. We had just left off with our initial application of mosaic tiles…
The next day we finished up the tile application. We let them set overnight before moving on to grouting the next morning.
After applying all the tiles and letting them set up for about 24 (ish) hours this is what they were looking like
Don’t mind the face plates, Naomi was trying to figure something out with them….
Before moving on to grout we needed to seal our tiles. For us this step was essential because our tiles are inclusive of natural stone and because thats what the manufacturer’s instructions told us to do! We chose this
Now this step was a bit tedious because we could only apply the sealer to the marble, not the glass. So with a lint free white towel I applied the sealer to the stone following the instructions on the back of the bottle. Its a good thing I had nowhere to be, because that part of the project took a minute!
After finally finishing the sealing and letting it cure for a bit we moved on to grout. Now this is where personal choice totally comes into play. We opted to, again, follow the tile manufacturer’s recommendation and chose to go with a non-sanded grout. Because our mosaic tiles include glass we didn’t want to take the risk of scratching or damaging it. I’ve read and seen many applications where folks have chosen to go with a sanded grout as well. Again, its all a matter of personal choice.
We also chose to go with a white grout. Originally I wanted a grey grout, but we decided on white after we saw the tiles in our space with our lighting, etc. This is what we chose
The tiles had a bit of grout haze to them which is completely normal and annoying to get rid of. If you’ve never seen grout haze, its basically a cloudy film left on the tiles from the process of wiping away the excess grout during the actual grouting phase. There are products available to deal with it, as well as various home remedies, but I tackled it with good old fashion elbow grease and a clean white terry cloth towel. I simply buffed it away in circular motions.
Next up came caulking. Notice the gap at the bottom of the tiles where they meet the counter top. You don’t want to grout that. That is left for caulk. I’m pretty sure you can use whatever caulk you’d like to, but we chose this


ogrodzenia pcv says
Wonderful beat ! I would like to apprentice while you amend your web site, how can i subscribe for a weblog web site? The account aided me a appropriate deal. I were tiny bit familiar of this your broadcast offered brilliant clear concept
pop over to this website says
I just want to mention I’m new to blogs and truly savored this page. Almost certainly I’m going to bookmark your blog . You surely come with fantastic stories. Thank you for sharing your web site.
Renee Manning says
@K Smith: I am curious about the old 4″ backsplash as well. It just disappeared. My guess is that it could have been a separate piece that placed on top and secured with clear gel like adhesive. If so, removing it could have been fairly doable. I’m upon a makeover on my kitchen in the next 30 days, I’m so glad I found this blog, via BH and G because this is exactly what I want to do in my kitchen in phases, of course. I hope she will respond, if not there is always email.
K Smith says
Looks like you kept your existing countertops. How did you remove the old 4″ (?) backsplash so that your tile could come all the way down?
K Smith says
It looks as if you kept your existing countertops. How did you remove the short (4″?) backsplash that as attached to the countertop so that your tile could come all the way down?
Elizabeth says
That looks absolutely beautiful!! Way to go!
I am going to do our backsplash someday too, hope I can pull it off.
Peace & Raw Health,
Elizabeth
Elizabeth says
That looks absolutely beautiful!! Way to go!
I am going to do our backsplash someday too, hope I can pull it off.
Peace & Raw Health,
Elizabeth
Shan @ Design Gal says
I love this! Thanks for the in depth details on how you did it! Maybe I’ll tackle my own kitchen next year! I have knotty alder cabinets though – would you recommend painting them? Or maybe staining them a darker color? They’re a blondish color right now.
Thanks!
Shan @ Design Gal says
I love, love, LOVE how this turned out! Thanks for the in depth details too! Maybe I’ll tackle my own kitchen soon! I have knotty alder cabinets though – would you recommend painting them or maybe staining them a darker color? (they’re currently a blonde-ish color – not my fav)
thatgirlblogs says
Exactly what I want! Gorgeous…
Julia Konya says
I hope you feel better. I wonder all the time how our fore fathers dealt with illness. When I get strep, I’m out. It hits me like a truck.
Anyway, that said, I can’t believe you dragged yourself in the kitchen and finished the project, which looks amazing. It all looks perfect together.
Brandi says
Beautiful job! I agree with Hilary- straight out of a magazine. Love the look of your gorgeous stove, tiles and cabinet colors. Such a transformation.
karen c says
What an amazing transformation! You did a great job, and your kitchen looks like it cost a fortune.
Shavonda says
Hi Karen. Thank you and thanks for stopping by. I assure you, my friend, it definitely has been a really really affordable transformation thus far:) Im so glad its coming together how we envisioned it in our heads. I hope you come back again soon.
Hilary says
Absolutely gorgeous. Some of those shots look straight out of a magazine!
Shavonda says
Hi Hilary (and future super adorable baby)! Thank you so much.
Mrs. Chic says
The back splash looks amazing! You two did such a great ob, love it!
Shavonda says
Thank you maam!:)