Hey Hey friends!
THIS IS NOT A DRILL PEOPLE!! The primary en-suite addition is officially underway! I’m pinching myself as I type these words because HOLY SMOKES what a journey it’s been. This is the first of many many posts in the series dedicated to the construction of this space. This will be a bit of a long one, but I wanted to lay everything out here so you can come back to it if you need. Also, there’s just so much info so here we go….
THE CURRENT SPACE
We’ve renovated or updated pretty much every inch of our little bungalow since we moved in 12 years ago. It’s been a marathon of dreaming, planning, saving and doing one project at a time over the years. Tackling the primary en-suite addition is the last piece of the puzzle of our long term vision for this house.
One of the selling points for me (and pretty much the ONLY selling point for Naomi, lol) when we decided on this house during our home search was the size of the property. We are on a really generous sized lot of almost half an acre. Since we were giving up quite a bit of space and convenience in our downsize from 3 bathrooms to just one, the plan was always to add another bathroom at some point.
Because our house is technically a two bedroom, when we moved in Michael got the secondary bedroom and we gave the primary to Bryanna. Now that Bry is gone we have been using it as a guest room.
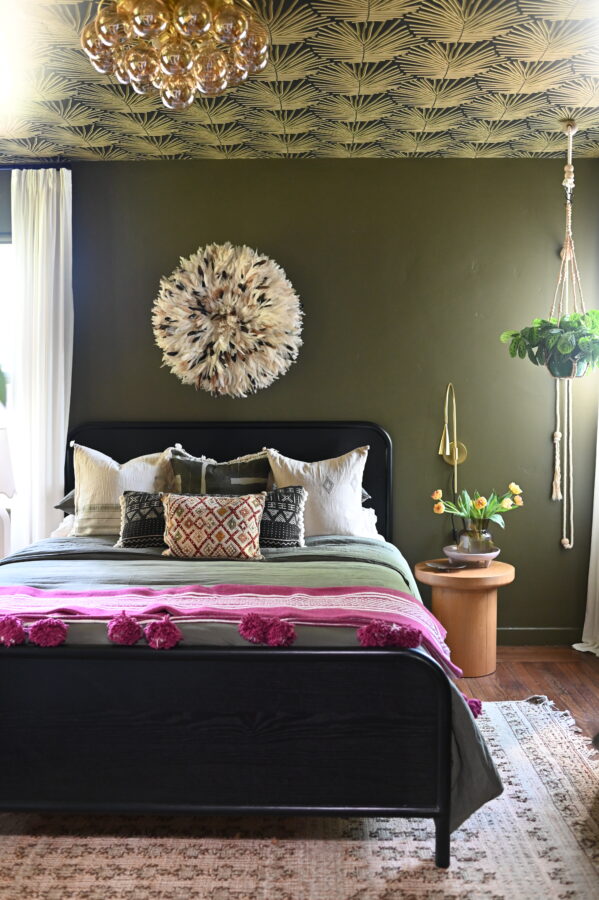
Naomi and I created a bedroom for ourselves out of a room the previous owners used as a den. It’s worked perfectly fine for us for over a decade, but the plan was always to reclaim the primary bedroom once Bryanna grew up and left the nest.
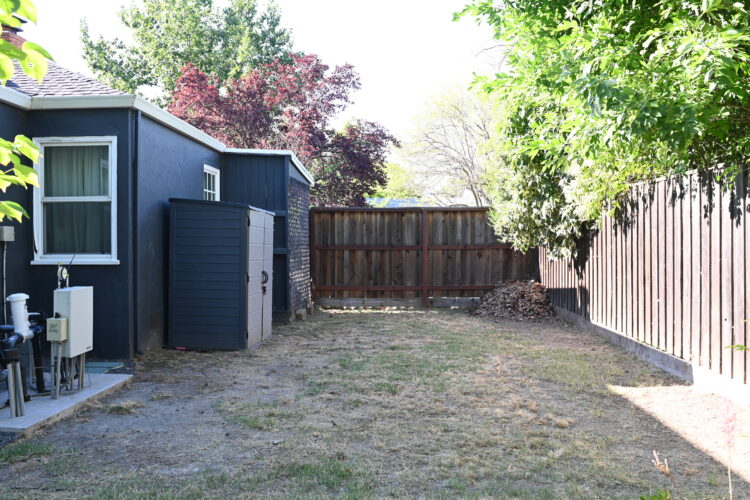
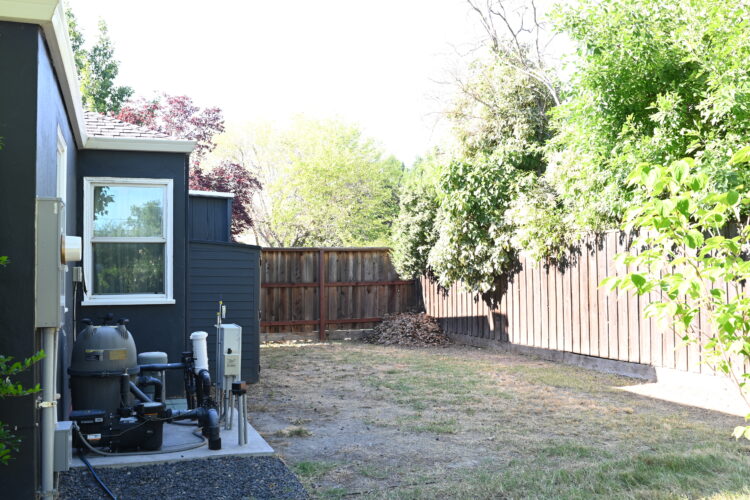
The bedroom sits on the side of the house with about 20 ft of space out to the property line so it’s in the perfect location to add a bathroom and walk-in closet and create a proper en-suite. This area has just been dead space all these years and has been Callies relief area. This is the view of the area from the backyard.
This is the view of the area from the front yard.
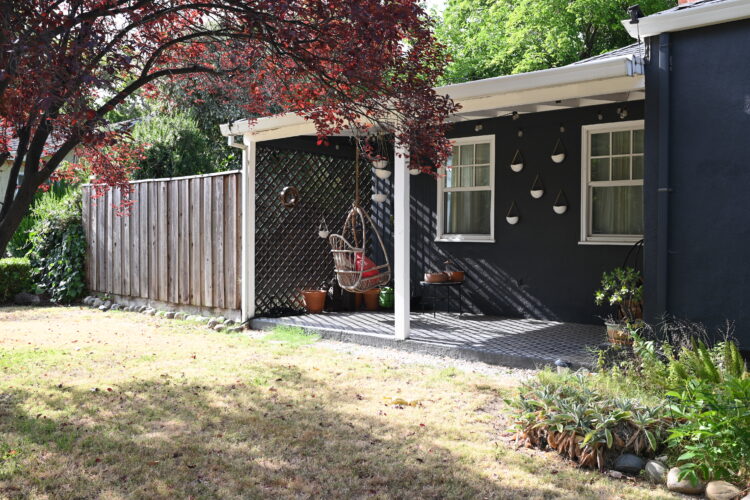
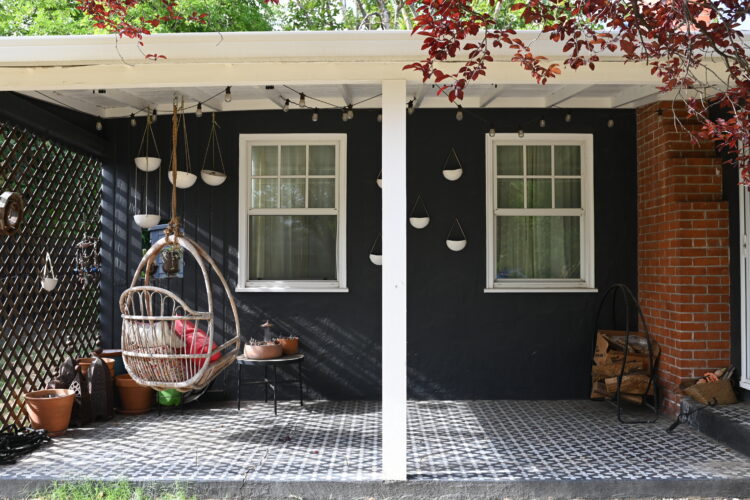
We will be keeping the porch, but there will be a few changes happening here. It will be a bit smaller as we are absorbing some of the space for the addition. We are exchanging the windows for a smaller size that will feel proportionate to the new size of the porch, and it will give us a bit more wall space between our bed in the room. The change I’m most excited about is the new roof. I think the previous owners added the porch at some point but didn’t give much thought or consideration to the roofline. Its ALWAYS bothered me that the porch has a flat white roof that looks disjointed from the rest of the house, especially so from the front elevation. The new views will be SO much better since we are ditching the roof altogether and instead doing more of a pergola style open cover with chunky redwood beams that I will grow climbing roses or bougainvillea on. This will let in a lot of light to the room as well. It will basically become more of a little Mediterranean courtyard off the living room. It’s also going to look great with the new front yard landscaping plans.
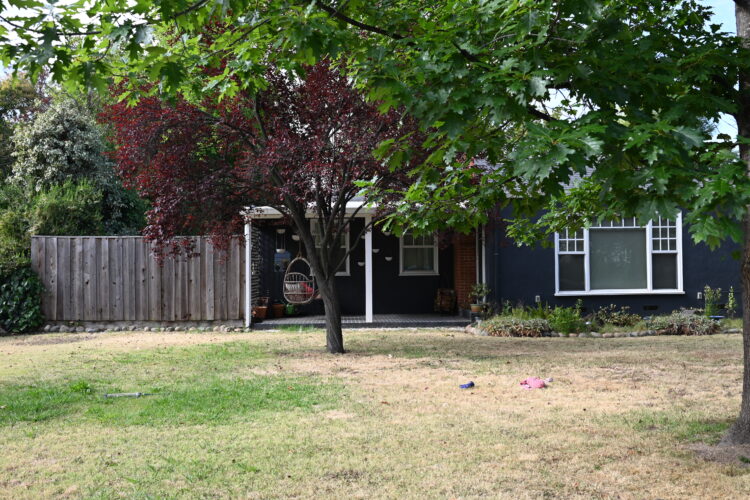
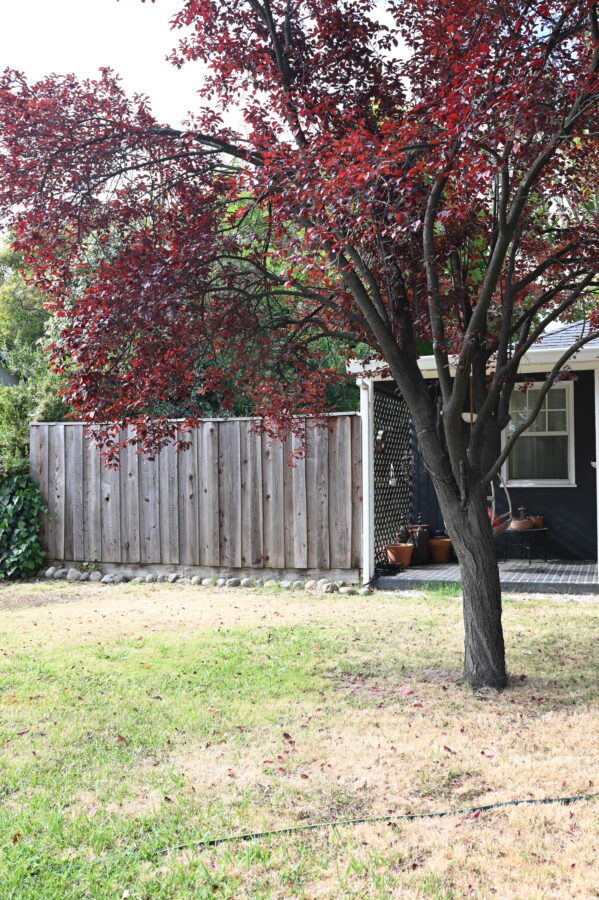
The section of porch to left of the left side window and pretty much all of the fence extended into the yard a couple of feet will now be part of the new walk-in closet! Also, sidenote: that Thundercloud Plum tree is being removed a little later as well so these views are about to be the stuff of my dreams!
THE ARCHITECTURAL PLAN
Going into the design of the space the goal as never about adding a ton of sqft to the house. In fact, I wanted to keep things under 400 sq ft because I didn’t want our house any bigger than about 1500/1600 sqft total. The goal was to add on in a way that felt proportionate to both the existing bedroom (which we aren’t touching), and to the house as a whole. I wanted to try to do it in a way that from the street you wouldn’t be able to tell it’s an addition. It was also important that from the inside it flows with the rest of the house and doesn’t feel disconnected.
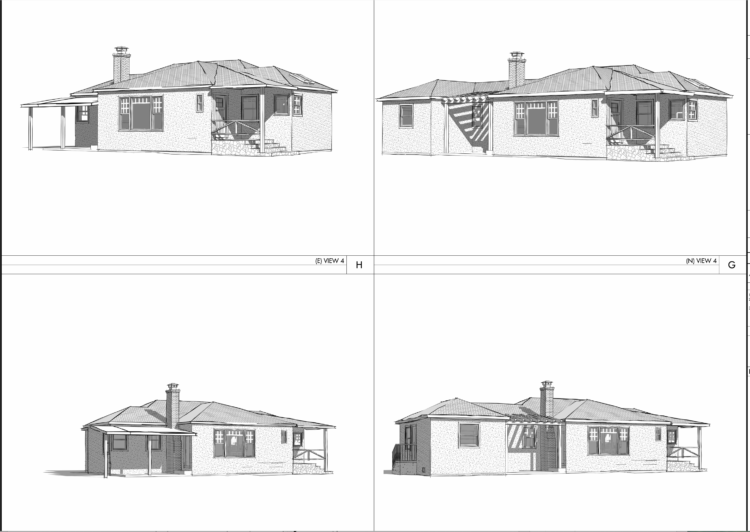
(existing elevation on the left, new elevation on the right)
We had some constraints around setback rules which really challenged us think of how to create a floor plan that was smart, functional and balanced. Working with the same architect we used for the kitchen renovation, we went through about 6 different iterations before we settled on the one we took to the county for approval. Ya’ll, I LOOOOVE this plan so much. I think it checks every box we wanted and then some! I LOVE space planning, so this was such fun process for me. The only edit here is we are going with a single sink, instead of double sinks. Yes, on purpose! Also I’m about 90% sure we are adding skylights in the closet as well!
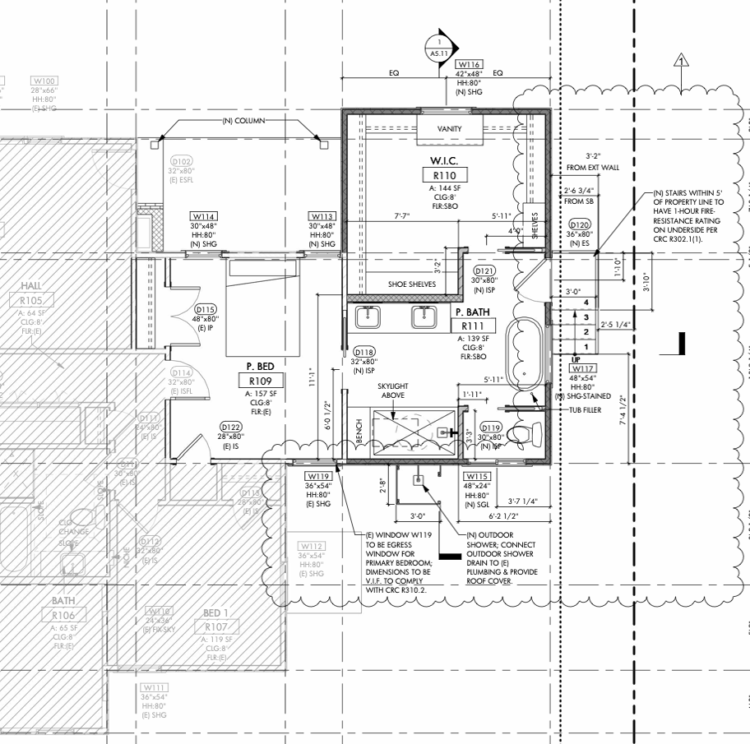
Here were our priorities as we created the floorplan:
-Under 400 sq ft
-Retain the 8 ft ceiling height of the rest of the house
-Must stay on one level, not build up
– Large shower with skylight
-Freestanding tub centered on a big window
-Generous vanity area with a SINGLE sink
-Water closet
-Exterior access
-Large walk-in closet with enough space for Naomi’s entire sneaker collection
-Pocket doors to maximize space
-Outdoor shower
-Small private courtyard
From a visual perspective, I knew exactly what I wanted this space to look like well before we ever started working on the floor plan! Basically the entire design started with the view into the bathroom from the bedroom. I always envisioned a tub (either copper or clawfoot) under a big window (preferably stained glass) with a beautiful chandelier hanging over it as the focal point of the space. That’s what I wanted to see as I stood in the bedroom and looked into the bathroom. I definitely prioritized sight lines. And since the house is so small I knew that would also pretty much be the view from the hallway as well.
THE MOOD BOARD & DESIGN PLAN
Once we nailed down the floor plan I really focused on what I wanted the space to FEEL like. Most of the inspiration for the spaces I’ve created in our home either come from our travels, or there is a specific vibe or energy I want to evoke. Designing this space was no different. I immediately recalled my travels to Morocco and our family travels to Mexico. I wanted Naomi and I to feel like we wake up in a boutique hotel in a collective of our favorite destinations every day. In the end I decided the vibe is “Moroccan riad meets Mexican hacienda”. It was also important we keep in mind our homes 1940s CA cottage bungalow roots. This design is a blend of all the things that make it feel traveled and elevated, but still has the details that honor its c0zy bungalow architectural style.
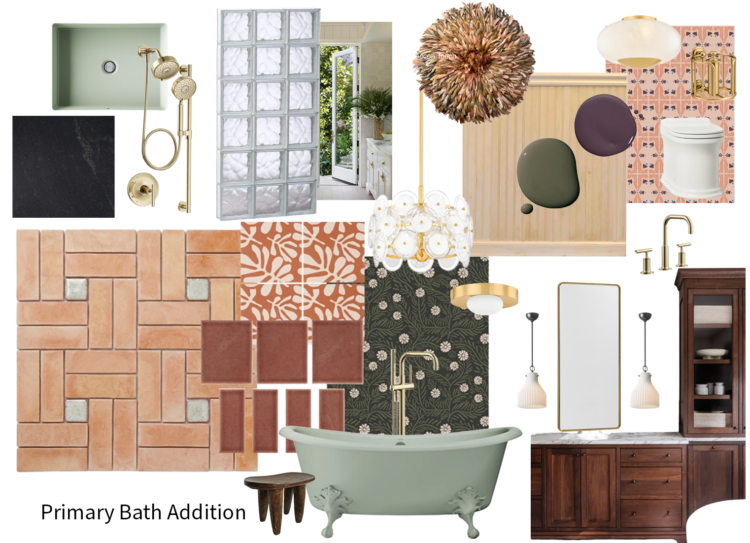
We wanted this space to feel warm, earthy and layered with texture. Aaaaand of course it had to be moody and color filled. I absolutely had to have wallpaper and skylights, and I really wanted to incorporate terracotta tiles. Naomi wanted a nice big shower with a built in bench. We both wanted a smart toilet with a bidet! I also wanted really beautiful lighting and a vanity that felt like an heirloom piece of furniture. Lastly, we both wanted a nice big custom closet! We will get into the closet design in a separate series of posts.
BREAKING GROUND
I barely slept a wink last night in anticipation for today! Demo Day is always exciting because it means plans become reality. Because we are adding on to the house there wasn’t an extensive amount of demo to be done. In fact, the only area that needed to be demo’d at this point in the project is the side porch off the front of the house.
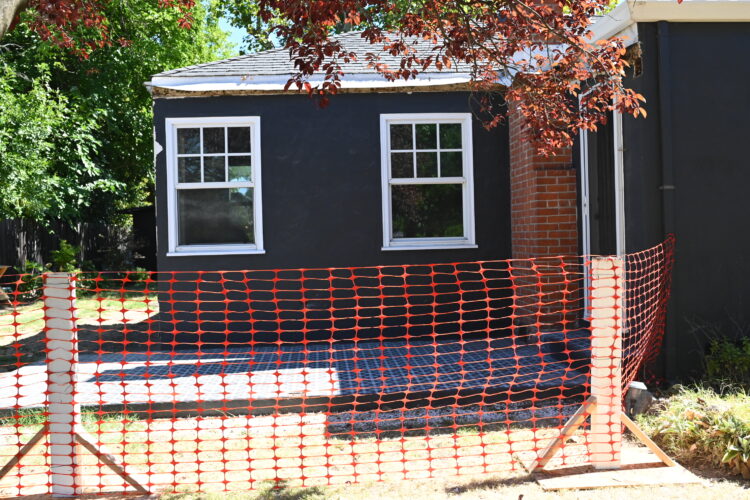
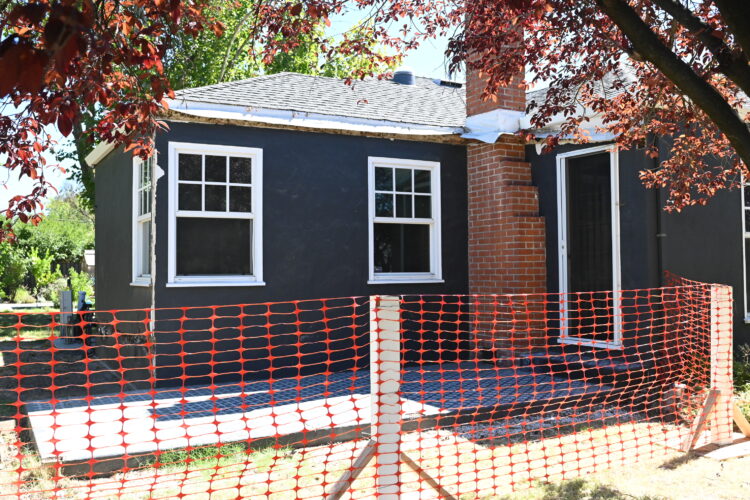
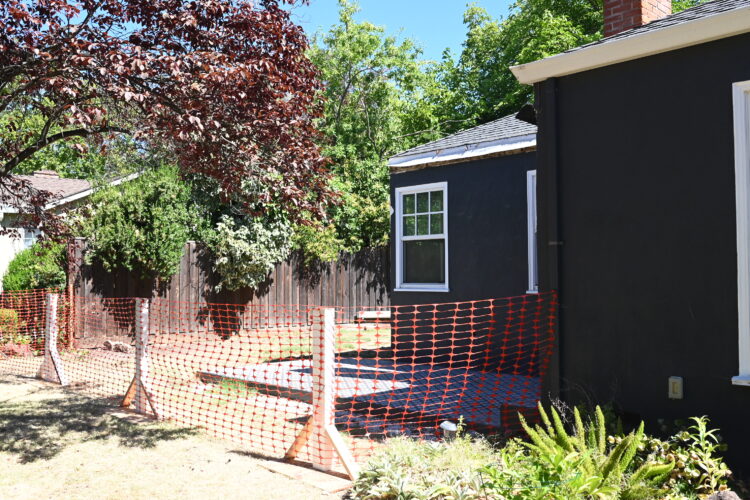
They made quick work of getting this all taken down. Tomorrow the real work starts and by the end of the week we should have footings for the new foundation, a new porch floor and we will be ready for subfloor framing and the start of plumbing work next week.
Alrighty friends, that’ll do it for today. I know it was a lot, but the process is A LOT and I don’t spare details with ya’ll. I’ll dive deeper into the final design and share renderings in an upcoming post. There have been several pivot-a-bitch moments during the process so I definitely want to explain how we came to some of the decisions in the end.
I’ll also be sharing this project through weekly vlogs on You Tube, so make sure you’re following me there so you don’t miss a beat.
Until next time friends……
ContentFan030 says
Interesting perspective on this topic, thanks for sharing such detailed insights. zkascdn
jenny says
Hi Shavonda,
So happy to be reading you here on the blog again!! The design looks so lovely, can’t wait to see it all finished IRL!
Kathryn Leight says
So so excited! The shower skylight, the pergola, and that tub sound so beautiful!! Let’s go!! 🙌🎉